By Etienne "Vexode14" Beschet
Today we'll dig into complex tricks you can achieve with akeytsu. I’ll show you how to rig the face of a character using ONLY joints (and some patience). This tutorial is made for users who already know akeytsu basics (create/bind skeleton, tweak weights, use the bind/skin & check poses...etc).
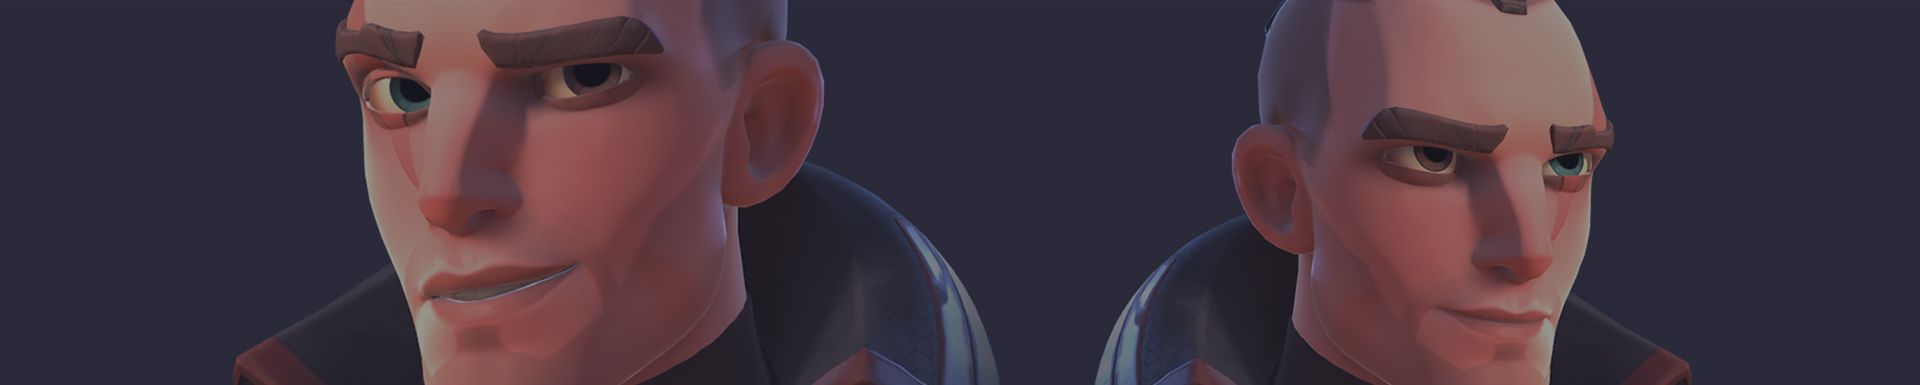
Credits : Sky Surfer 3D sclupt by Sergey Katsukov
Version : akeytsu 1.2.1.
Diclaimer : this guide does not reflect the final user experience that we want to offer with akeytsu in the long term.
If you’re new to akeytsu but would like to know more about rigging a face, I highly recommend watching my rigging & skinning livestream on 80 LEVEL
here or akeytsu tutorial series here before getting started.
While akeytsu will get facial blend shape controls very soon (which suggests a totally different pipeline), a good use of the existing toolset already allows you to work wonders! Feel free to play with project files and share your animations on social media with #akeytsu #MadeWithAkeytsu #FaceRig #3DAnimation #RealTime #GameArt so that I can see what you've done with it!
Don't hesitate to take a look at "SkySurfer_FacialRigExercise_Final" while following the steps to make sure you are on the right track.
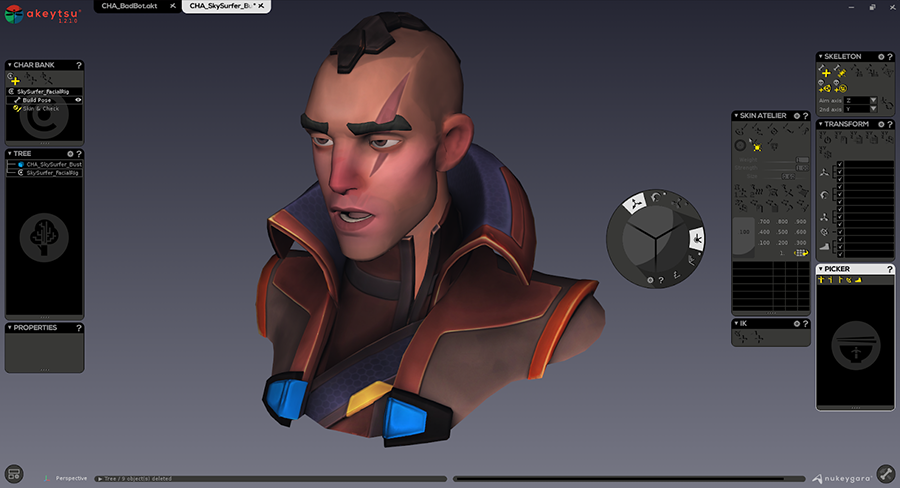
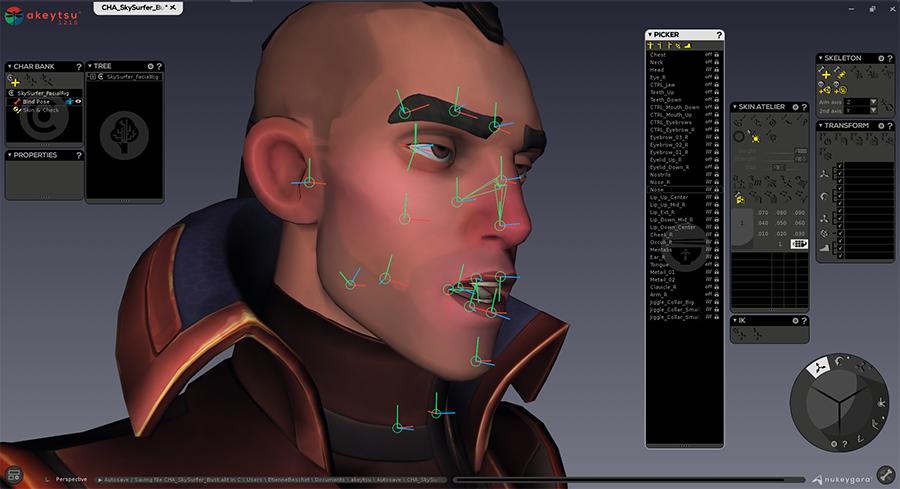
Import the “SkySurfer_FacialRigExercice_Start.akt in akeytsu (simply drag & drop the file in the viewport).Here is what you should see more or less depending UI preferences. Please note that I won't be using the new joint light display in this tutorial as it was made using akeytsu 1.2.1.
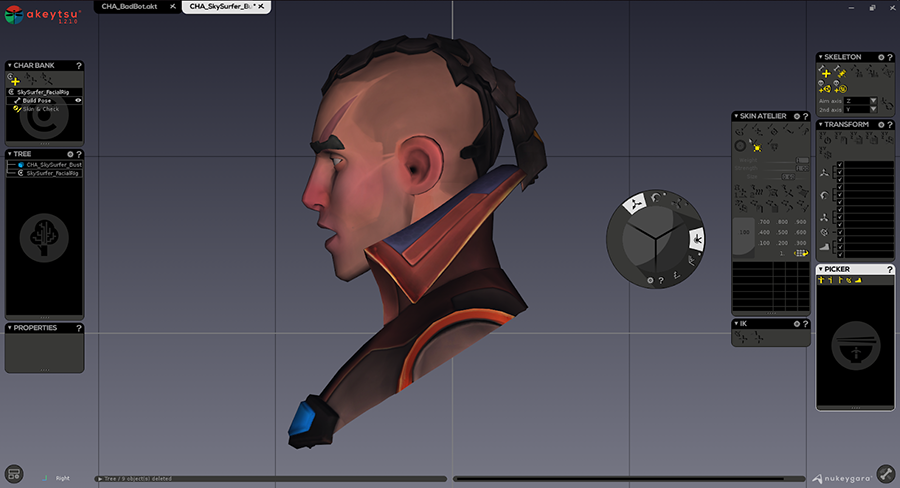
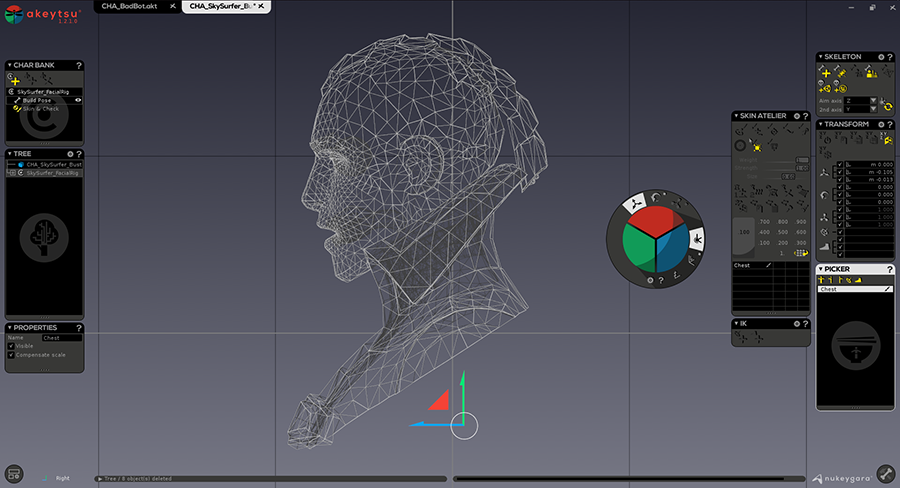
Go in side view and start adding joints outside the mesh. This will snap them to X=0 and you can then simply drag them back into the mesh.
Toggle wireframe view, and start bycreating a chest joint which will act as our “root” joint. Don’t forget to disable “auto-orient joint on creation” in preferences, as we’ll manually set-up joint orients later. Displaying joint pivot axes is an option that will help later.
Now tweak joint display size to 0.300 which will be more convenient than adding all facial joints .
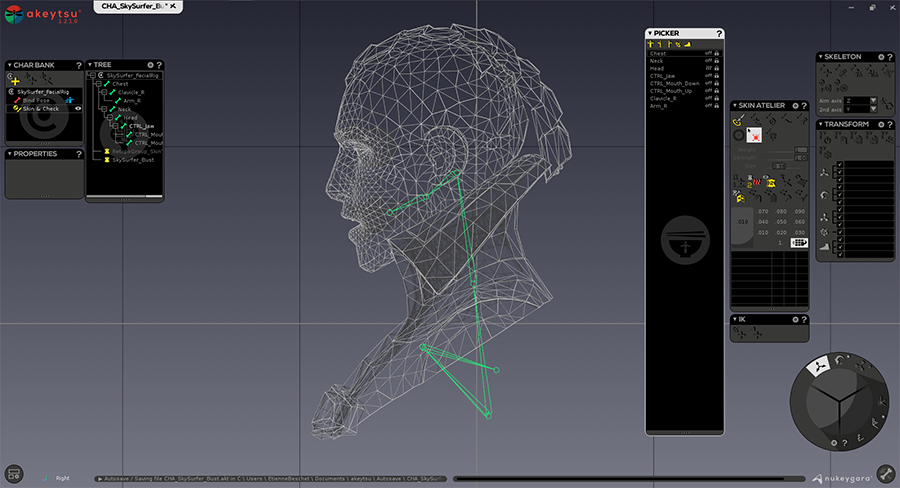
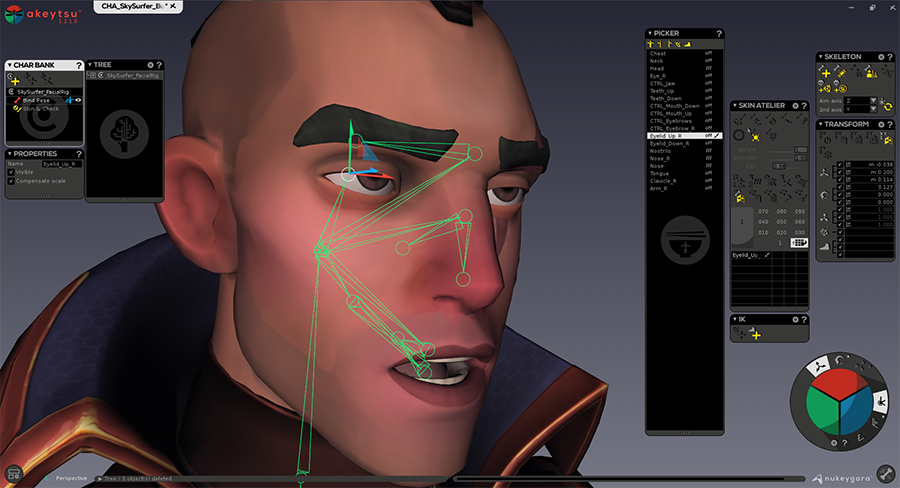
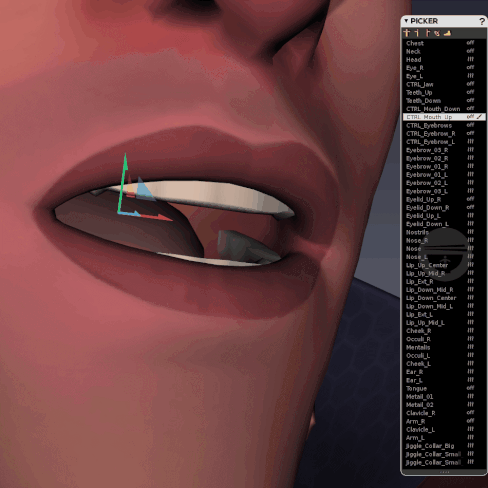
You want to start by placing basic joints in the neck, head and face. Note that I have set-up two extra joints named “CTRL_Mouth” on the screenshot below. They’ll basically help me later to manipulate face parts and facilitate transforms with lip joints while keeping their offsets put allowing us to keep the shape of our smile.
After doing this we can get back to perspective view and add joints for the right-hand side (Eye, clavicle, arm), a CTRL_Eyebrows joint (centered) and a CTRL_Eyebrow_R, which will allow you to easily manipulate your eyebrow later while preserving its arc shape (same as what we’ve setup for the mouth). You can parent the joint of the right eyebrow to the centered one if you want. I’ll go back to parent/child logic later anyway.
TIP : you can snap new joints directly on the surface when creating them by displaying only the facial mesh. To do so: select one head vertex > expand selection > invert selection > Hide polys > Select facial part using middle mouse button (lasso mode) > invert selection > Hide. Now you can create joints on a “one sided” geometry surface because akeytsu automatically centers the joint inside the 3D volume clicked on. To make our life easier here we have simply reduced the 3D volume to a simple surface.
Now let’s add Nose joints. You usually need 3 joints : one “Nose” which will basically control the Nose “line”, a “Nostrils” and a Nose_R which will allow us to control the upper nasolabial part and emphasize angry expressions.
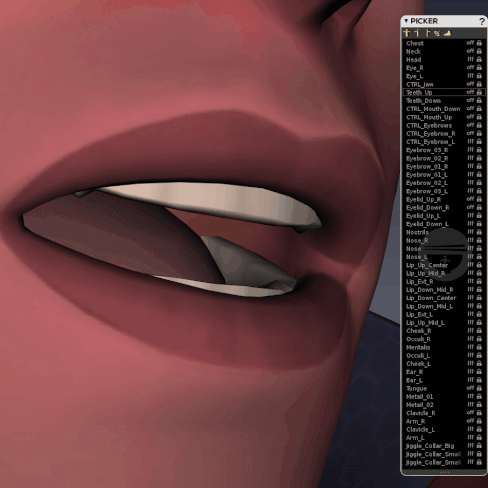
Add two joints for Teeth up/down and another one for Tongue. Check all your center joints and reset their “move X” value to 0.000. We’re done with basic face joints !
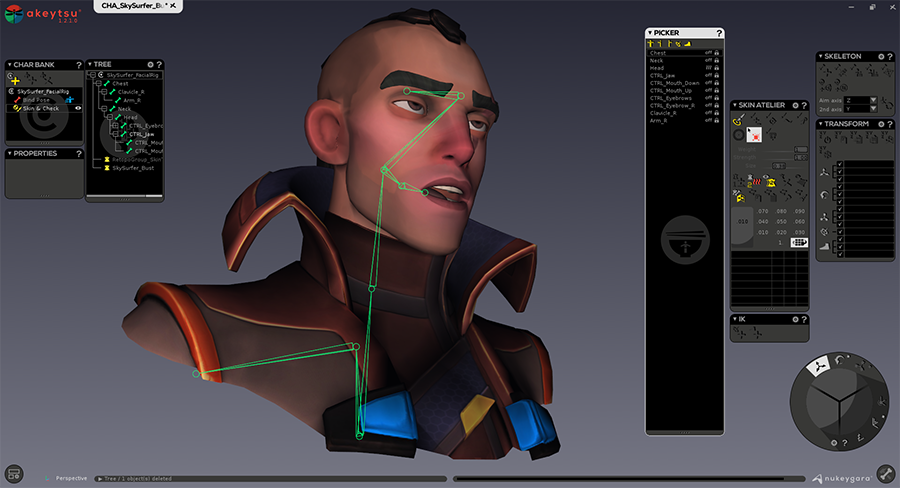
Now we’ve set up the base joint layout, we need to add some more joints around the mouth for eyelids and eyebrows and finally some that will help untighten the density of topology for extreme expressions (like “joker-smiles”).
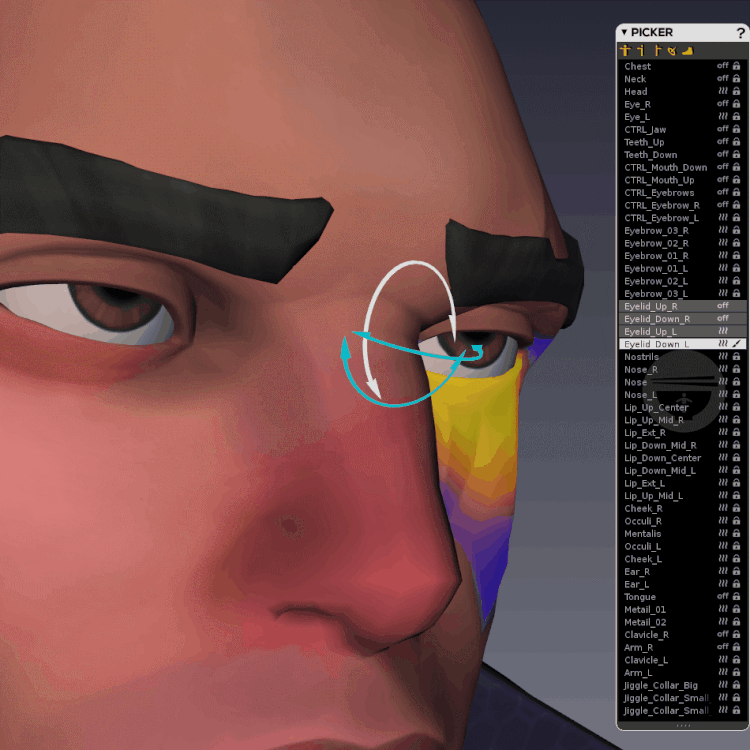
First, eyelids. We want to be able to open/close our eyes with ease. There are two methods. You can have several joints (let’s say 3 up and 3 down), this way you could control the eyelid like a boss, but it may also be a real pain if we want to simply open/close these parts rapidly, and as most transforms will be interpolated based on moves it can lead to eyelids geometry colliding with the eye, so you’ll have to be careful each time you’ll animate this part...painful. To have a better process while we animate, we would rather use rotation on a single joint per eyelid, so one up, one down, and that’s all. That way skinning will be simpler, transforms too, instead of having tons of joints to manage.
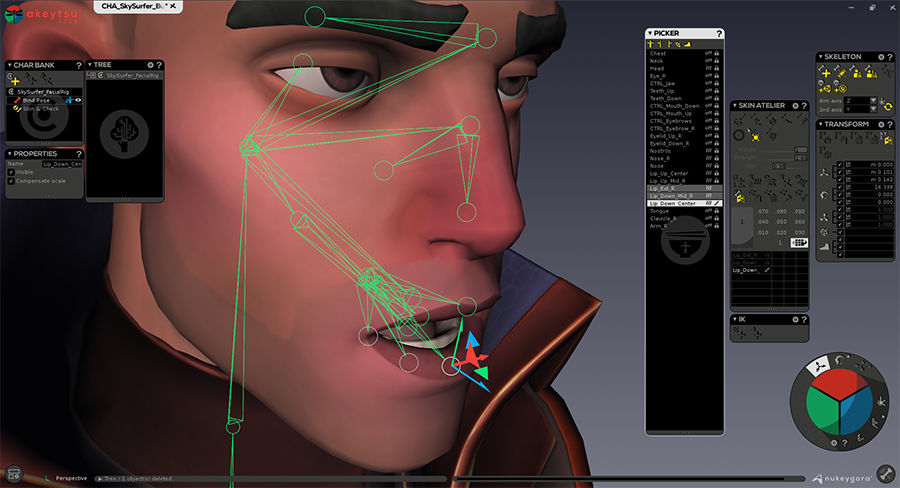
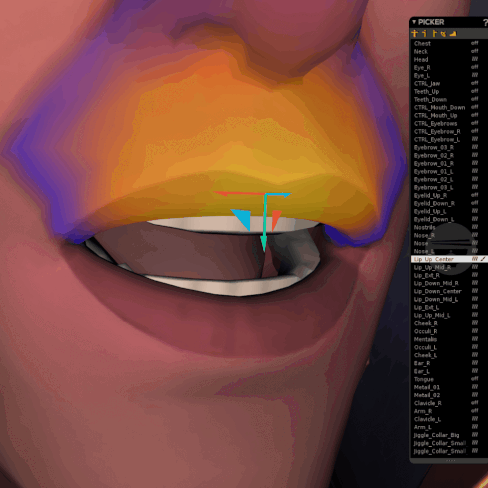
So now, let’s create more joints based on our Mouth controllers. Keep in mind that ultimately, all these Lip joints should be connected directly to their respective CTRL_Mouth joints. While making these, we’ll have to make a corner joint which has to be parented to the lower part of the mouth because it feels more natural to have a wider lower-jaw than a wider upper-jaw (imagine an aggressive Orc from WoW).
TIP : Name joints using the “most common to most precise” logic. Start from the Lip joints and add suffixes like up/down and Center/R/Ext_R. The logical choice here is to make sure we can browse through the mouth hierarchy following a circle (as if you had drawn a “O” around your lips). This will allow you to edit joints in series according to mouth anatomy. The second word in the naming convention will be Up or Down, and the third Center or R or Ext_R as shown in the picker of the following screenshot.
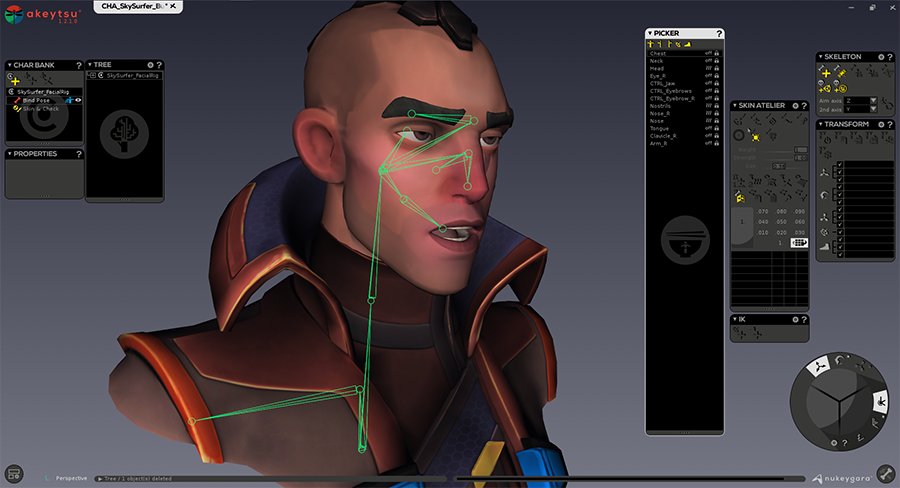
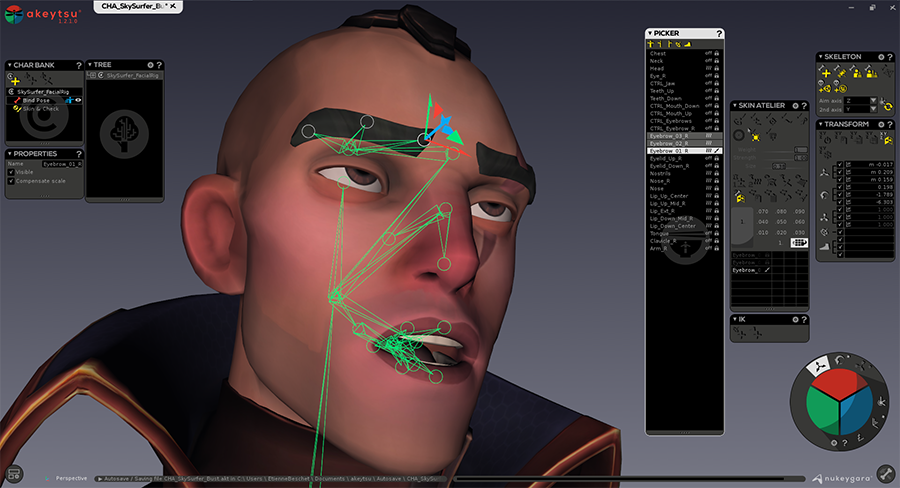
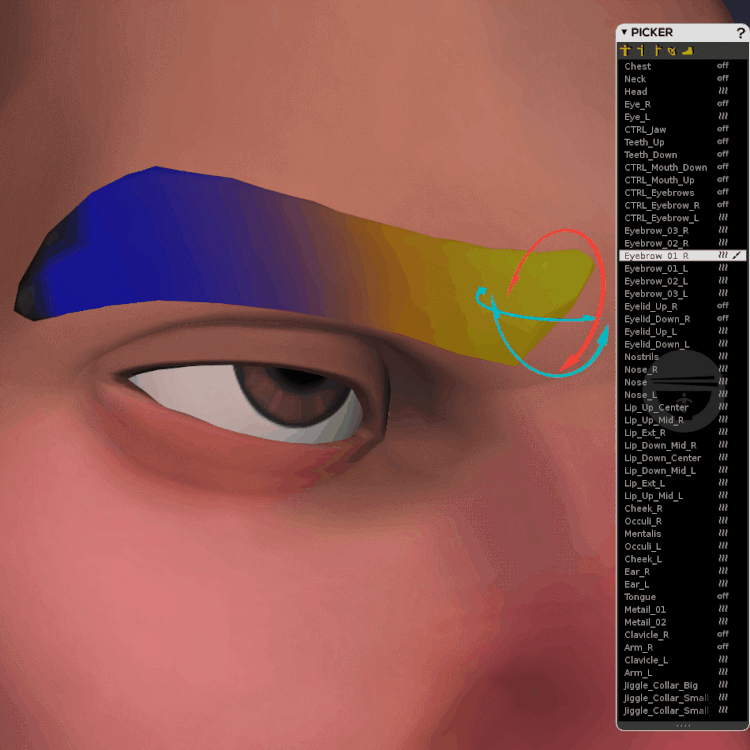
To have finer control over the shapes of the eyebrow add Eyebrow_XX_R Joints (4 is kinda good, but let’s keep it to 3 here), they should be parented to the CTRL_Eyebrow_R to facilitate manipulations of the full eyebrow as explained before.
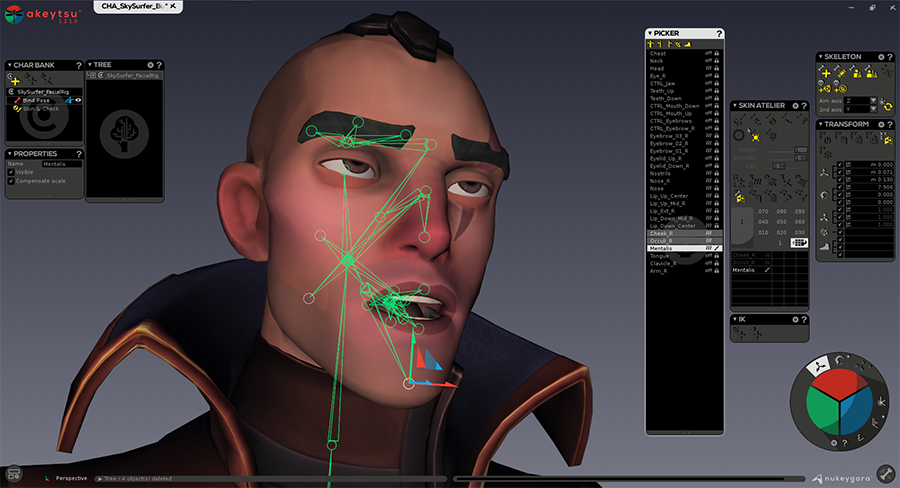
Finally, we need to create “relaxing” joints (so we can make a creepy Joker-Smile).Name them like so: Cheek_R (upper one), Occuli_R (mid one, near the mouth), and Mentalis (the lowest one, very useful to reshape the face).
We can also add some extra joints for Ears, Collars (big and little ones), and Tail.
Feel free to name facial joints in a way that makes sense for you (and your animator if you are only rigging). The key things are that 1. you don’t want to spend time guessing which joint does what 2. You have a clean picker hierarchy you are comfortable browsing through. In this case I wanted to have the my major facial features grouped together and listed in a way that allows me to jump between my joints following a natural flow.
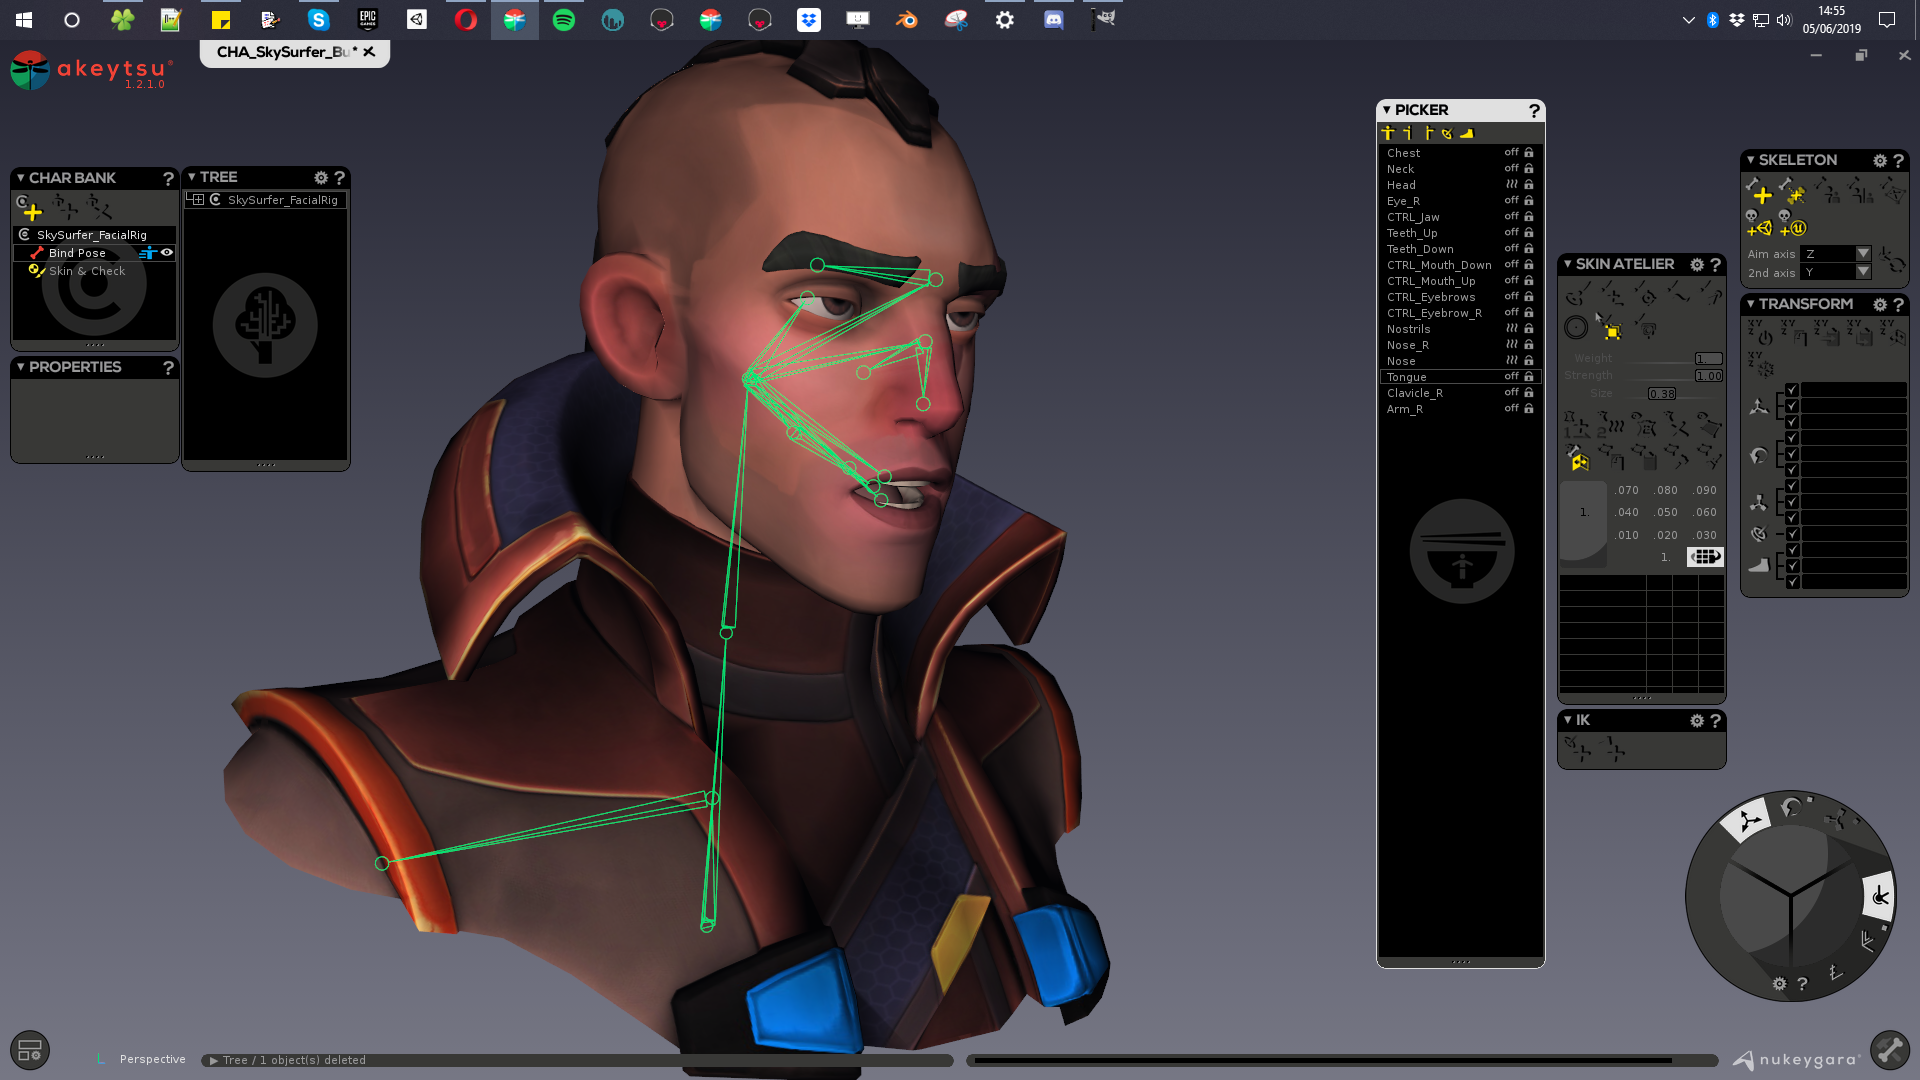
In order to facilitate the editing of pivot orientation, I like to hide basic joints (in fact those who control full limbs like the Head joint). Akeytsu will keep child joints displayed and give you a lighter and simpler rig to work with.
The main idea behind orienting joints here is the same one that you apply when refining pivots of a 3D model to ease manipulations in local transform mode. Here joints needs to be oriented to facilitate facial manipulation. The Y green rotate will impact our Z and X axes. Z axis looks like your vertex normals, while the X axis represents its tangent (see below).
During this process, don’t hesitate to select joints and see how they react, using move and rotate gizmos. It needs to fit your needs. Here I purposefully reversed the X axis of my Occuli_R pivot to make it easier for me to manipulate bi-axis transforms.
TIP : Let’s perform a little black magic =D Assuming you already know how to CopyPaste Skin Weights (tutorial here), you can transfer skinning data to another or part of another mesh (much like a Skin Wrap). If you want to skin your clothes like your torso and you only have one mesh combining both. Simply duplicate your character and copy skin from your torso to the cloth of the original mesh. The cool thing with this technique is you don’t have to split your mesh and you save a draw call in the engine.
We can use this tip to skin the head easily. Let’s get things done properly. Be sure to be in step 2 of the Duo Skin process. Select the master joint (Chest) and
ADD at 100% all vertices to it (so all weights are assigned to Chest). From here,
ADD rigid weights to each joint following the hierarchy (akeytsu will automatically remove influence from Chest as you go). Avoid using right click to remove weight as it will mess up your influences with multiple child joints assigned to one parent.
Once all vertices are correctly hard-weighted, go back on Chest and zoom out+set your smooth painting brush to its max size and strength (brush should be in hard mode). Again start from chest and go down the hierarchy to smooth each joint influence. After multiple smoothing operations, akeytsu will warn you that you have exceeded 8-joint influences on many vertices. That’s because real-time engines can’t handle more than 8-joint weights per vertex at the moment (but akeytsu is fine with that and that’s where you begin to get how powerful it is under the hood).
Do the same operation for the right eyebrow, but only weight it to Eyebrow_01_R + Eyebrow_02_R + Eyebrow_03_R. It allows us to push transforms more than what’s allowed only by CTRL_Eyebrow_R.
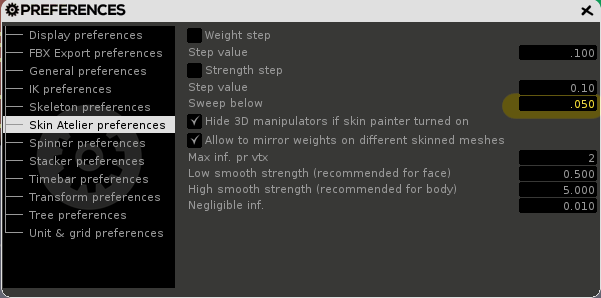
After doing this we will prune all these vertex weights so each vertex will be at max. 8 weights influences. To do so, go in Preferences>Skin Atelier Preferences, and edit the Sweep Below value from 0.05 to 0.1.
Why “from 0.05 to 0.1” ? The lowest will retain the best smooth possible but can sometimes not be enough to clean up your vertices. The highest should completely clean your vertices but you won’t get a perfect smooth. I encourage you to test values to find what works for you. Please understand that final result also depends on your topology and skeleton density.
To perform this prune, select first the vertices you want to clean up, then click on the sweep brush magic button denoted by the below icon.
Now you can polish the bust of the character as you would usually do on your models, just keep in mind that you should always prevent akeytsu algorithms to perform mirror skin/smooth end skin on non-symmetrical parts of the mesh, because it will try to mirror parts that should not be which will lead to incorrect results. You want to lock these painted areas.
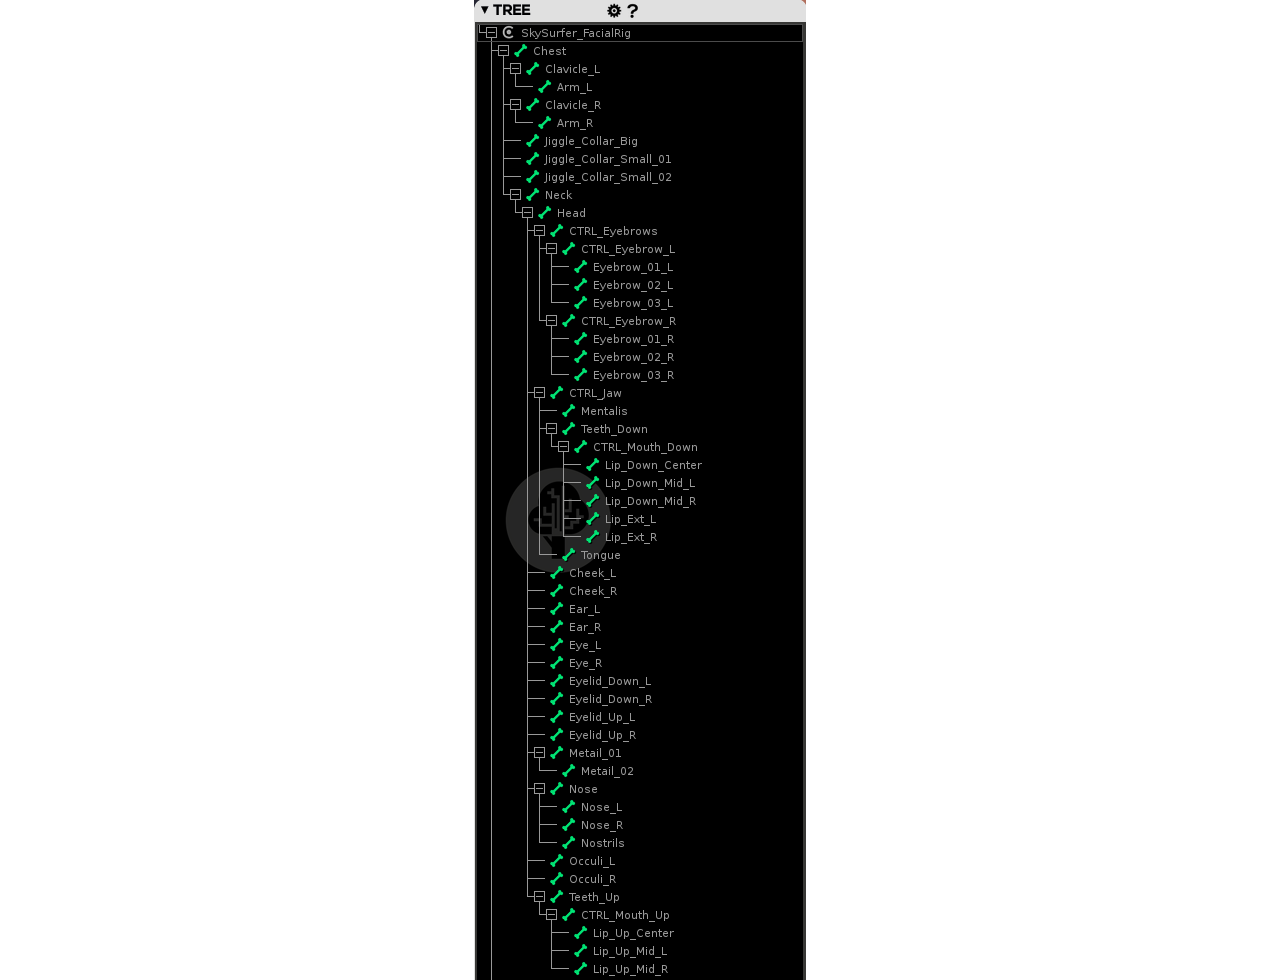
Our skin is finally done, we have to finetune joint hierarchy and set more ergonomic orients to easily manipulate our facial rig. We’ll take full advantage of what akeytsu has to offer and build a rig with the right level of complexity under-the-hood to end up with simple and easy rig manipulations with great level of control.
Let’s start the fun:
- Parent your CTRL_Mouth_Up to your Teeth_Up
- Parent your CTRL_Mouth_Down to your Teeth_Down
- Parent your Teeth_Down+Tongue+Mentalis to your CTRL_Jaw
- Parent your Nose_R+Nose_L+Nostrils to your Nose
- Parent your CTRL_Eyebrow_R+CTRL_Eyebrow_L to your CTRL_Eyebrows
Your hierarchy should look something like this :
Now polish your orient starting with the mouth lip joints. Orient them so that the Y-axis can be used to enlarge or shrink the global shape of the mouth. Orient the Teeth_Up/Down the same way but make it so CTRL_Mouth_Up & Down behaves like a clamp. See references below.
TEETH UP / DOWN + CTRL_Mouth Up/DOWN
By inverting our teeth and mouth rotation behaviours we can achieve a roughpose for an angry face very intuitively. For the eyelids, let’s do the same as the mouth to get an eye wink:
For more control you may want to export a skinned FBX into Maya/3dsMax/Blender in order to create a more advanced facial control rig with smooth transforms. These kind of controls are planned to be implemented progressively in akeytsu in the simplest way possible while maintaining a permissive workflow to enable creativity.
We have achieved a facial rig and we know how this works. An important thing is to understand how to adapt it to different productions in practice. A facial rig should be built depending on production needs and the one shown here won't work for all projects. You won’t need an overly complex face rig if you have no close-up shots on the face. You’ll just lose time building it and your animators will be at a loss with too many useless controllers. You gotta define your animation requirements for facial animation and create your facial rig accordingly as it can be quite a time-consuming task.
Last words of advise: remember to always take advantage of joints orients using bind pose!
We need your help to make akeytsu a better tool.
Write us on forums or our discord channel if you would like us to consider improvements.