By Charles Sultan, Nukeygara Developer
You don't know what skinning is or what voxels are ? You couldn’t figure out how akeytsu Duo Skin works ? You want to understand the secrets of the delta mush ? You've come to the right place! And for those who believe skinning is the necessary evil of animation: you are SO RIGHT ! But you can bear with me to learn a few tricks and make it easier for yourself !
Disclaimer: our smooth skin algorithm uses delta mush research published by Joe Mancewicz, Matt L. Derksen, and Cyrus A. Wilson, Delta mush: smoothing deformations while preserving detail, SIGGRAPH 2014, ACM, New York, NY, USA, Article 28, 1 pages.
In the 3D creation pipeline, skinning is the method used to bind the body to his joints. To do so we have to associate each vertex of the 3D mesh to a bone or multiple bones when influenced by different body parts. In more technical words, skinning is the data that weights the influence of each bone for each vertex. It is commonplace to express weights as a percentage. The sum of weights for a given vertex should equal to a 100%. When a vertex is selected, these can be read at all times in akeytsu in the grid of the Skin Atelier window.
In the screenshot below, the selected vertices are controlled at 68% by Pelvis and 32% by Thight_L.

A bad skinning immediately leads to undesirable results when animating and it is almost impossible to have a good output with it unless your mind works in mysterious ways... For the rest of us, proper skinning is needed to work in good conditions. To achieve this, artists have to spend a lot of time painting over a computed pass determined by a Skin Bind algorithm. This manual revision is the most tedious part to take care of because of the scrutinity and minutia it demands.
DUO SKIN PHILOSOPHY
The challenge we have set ourselves when tackling skinning in akeytsu was to find a reliable way to bring that manual skin painting pass to a minimum. To do this we designed an original methodology called Duo Skin (because it works in two passes). We first compute a Rigid Skin Bind and then perform a Smooth Skin pass in sequence. This method, well-used, allows for professional results in the least amount of time. While it can appear unconventional at first, it is much easier to iterate with in foreseeable ways and gives the user two levels of intervention which means more control over results.
Let's break things down and explain why.
RIGID SKING BINDING
OPTION 1: JOINT PROXIMITY
Our initial Rigid Skin Bind was distance-based. Its principle of operation is very simple. For each vertex, we choose the closest bone. That’s all we do! This distance does not relate exclusively to the joint position (small circles at the tip of bone) but rather to the closest point of the bone (which includes the circle AND the pyramidal shape seen in classic display). This algorithm is very quick to execute but the artist has to spend more time to correct it. It's especially unreliable with models that have a lot of bumps, protuberances and accessories. It's fast... but kind of dumb.
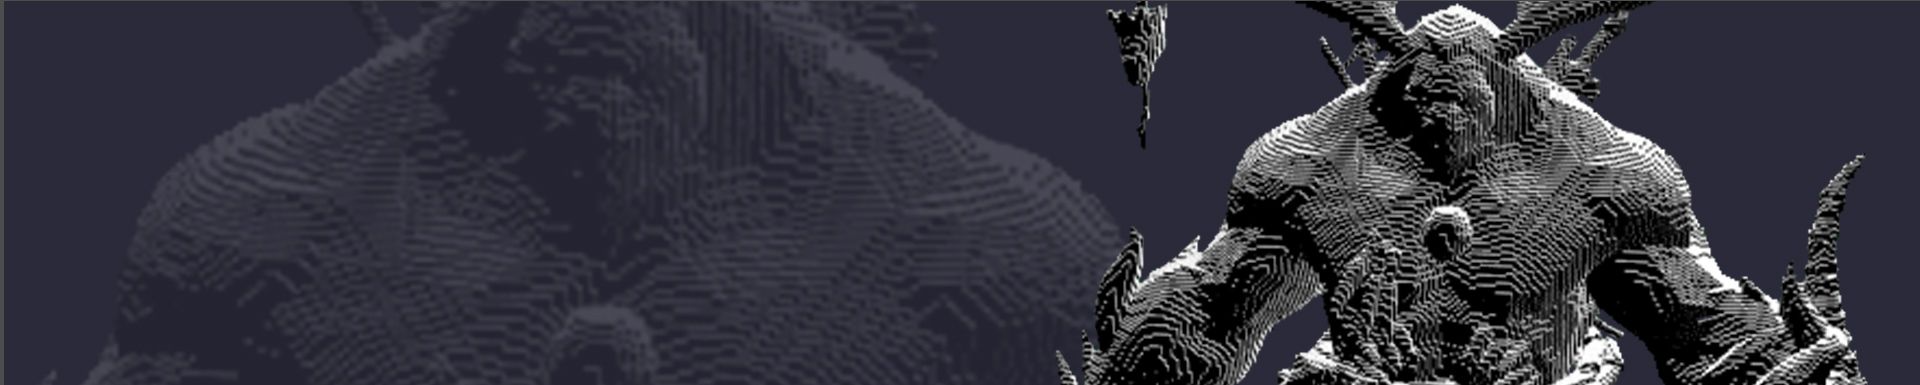
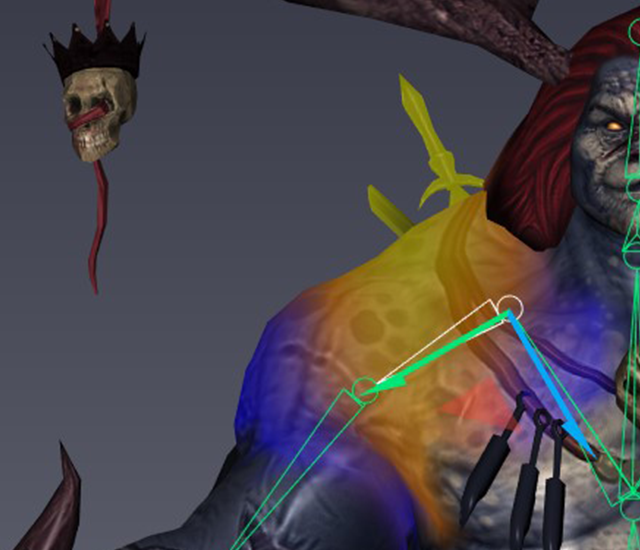
Here is my Rigid Skin Bind generated with the joint-proximity algorithm just for fun which perfectly illustrates what we just talked about. Moving the clavicle joint here will influence the little skull attached to hair. We don't want that.

OPTION 2: GEODESIC VOXEL DISTANCE
The geodesic voxel algorithm is more complex but also a lot smarter. The main idea behind this barbaric name is to cut out the mesh in a lot of little cubes. Then, just like explained before for the joint-proximity algorithm, we search for the closest bone to bind to each vertex. But this time the distance is calculated in the number of cubes we have to cross to get from the bone to the vertex. This little change makes all the difference because the path chosen to find the closest bone now depends on voxel topology.
Example of a mesh cut in small cubes when using Geodesic Voxel Skin Binding
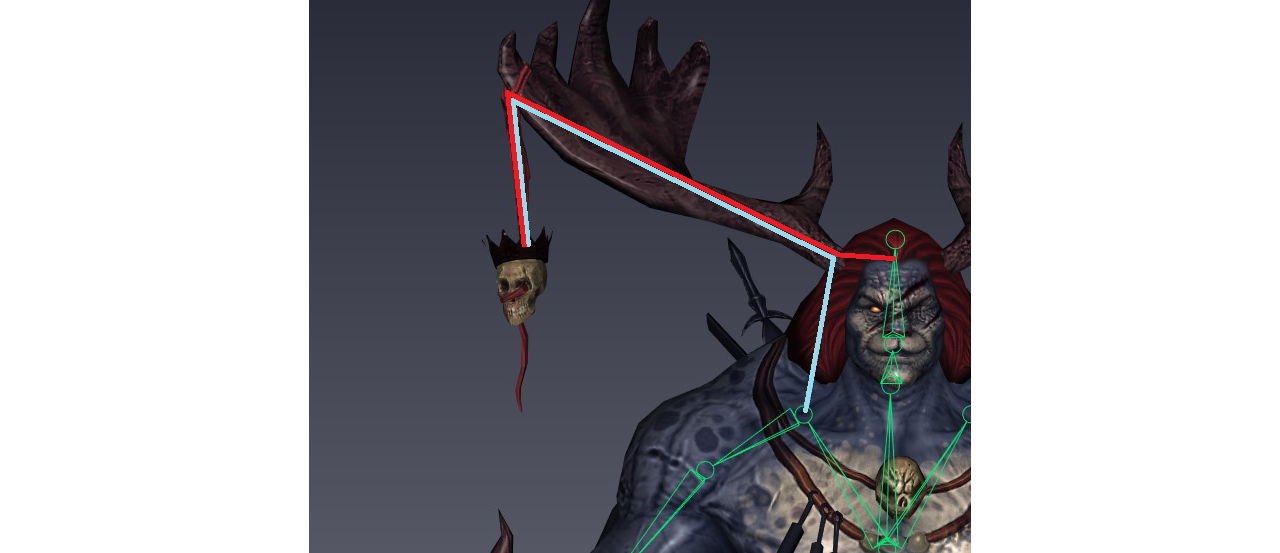
The distance between the little skull and the head in red will be shorter than the distance to the shoulder bone in blue which means all vertices from this part of the mesh will be correctly assigned with this method when calculating Rigid Skin Bind (Part 1 of Duo Skin).
But you may be wondering what if there is no possible path from a vertex to a bone ? Then this bone is considered out of reach to infinity and beyond. But what if there is no possible path from a vertex to ALL the bones ? In these very particular cases, we go back to the joint-proximity method which always finds a commanding bone.
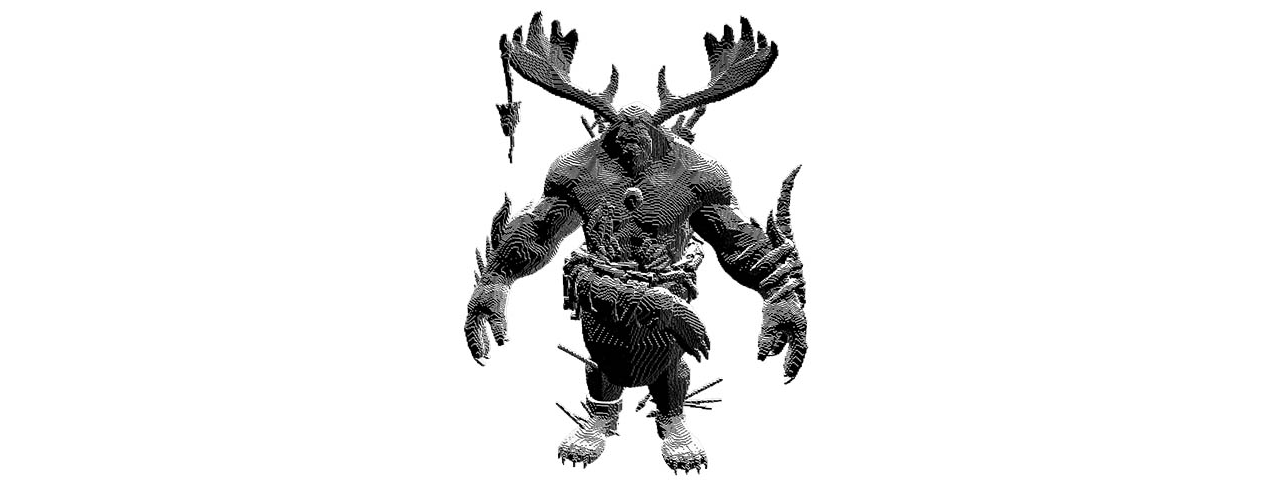
When your mesh has protuberance or closed legs/fingers, this algorithm avoids skin data errors. Again just for fun, here's the same monster with a rigid skin computed with the geodesic voxel algorithm. Sayonara shoulder bone influencing my little skull !

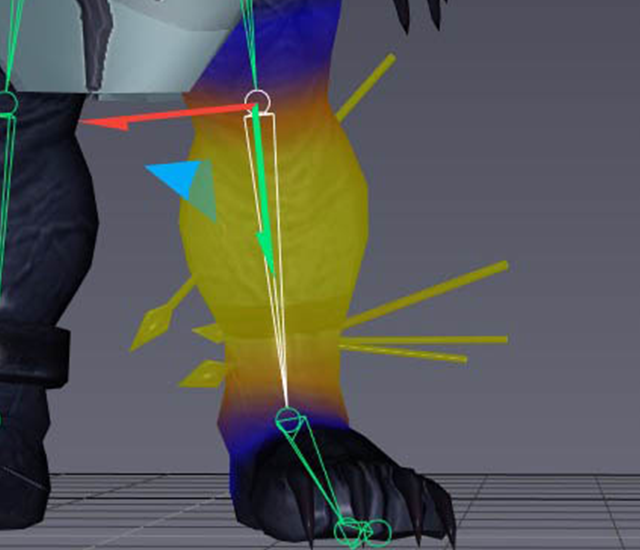
Here is another example where this works wonder. With the joint-based proximity setting part of the horn would surely have been bound to the Arm joint. In this instance there are no spill over.
OPTION 2: GEODESIC VOXEL - LIMITATIONS & SETTINGS
It's important to also emphasize the limitations of geodesic voxel binding. While this algorithm is smarter, it is also more demanding in terms of modelling to work correctly.
- If the mesh has degenerated geometry (bad normals, holes, or intersecting polygons) the algorithm will fail to correctly cut the model in small cubes. There may be leaks because it simply cannot understand what is inside or outside the model anymore. You get what you want with that.
- If the mesh has no protuberances or closed legs/fingers. Well...It won't be a suprise to say that geodesix voxel binding would be pointless. Using a smart algorithm when a more simple one can do the job leads to slower computations and loss of time.
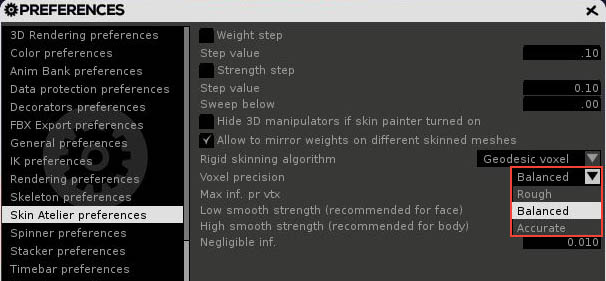
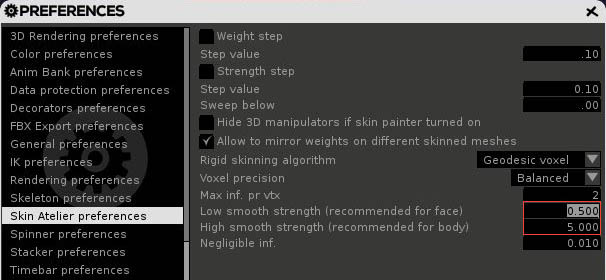
In terms of settings click the gear in the Skin Atelier window to choose from three options in Preferences. You will generally want to use the Rough setting. It’s a lot faster with better results. If you have very close geometry (in case of very tiny hands with tight fingers for instance), prefer the Accurate setting.
SMOOTH SKIN
POWERED BY A DELTA-MUSH ALGORITHM
Now that we have a perfect rigid skin let's smooth it !
Most other DCCs let you use the same algorithms to generate Smooth Skin. We have a different approach in akeytsu based on a code written in-house inspired by the principles of delta-mush research. Delta mush is a very powerful technique that helps us skin complex meshes with lots of details. At Nukeygara we believe this is the very best automated approach possible. Delta-mush deformers can be found in other software but can’t be converted to skinning data without a plug-in. In akeytsu it comes right out-of-the-box. Simple and easy.
The main idea of this algorithm is to compute influences from a lot of poses considered perfect thanks to the Rigid Skin data computed before. We use the least square method to do that. If you don’t know how it works or if you haven’t heard of it, it’s just a mathematical method used to do regression analysis for complex equations. In this case this will help us select the skinning option that works best or generate the least errors for all poses.
BUT WHAT DOES DELTA MUSH DO FOR SKIN BINDING EXACTLY?
At first we generate an approximated mesh with smooth geometry. The number of passes we run to smooth the model can be set by the user. We then cache the local offset for each vertex so we can add them back at the end to match the original 3D mesh. With this approximated mesh we create a bunch of poses by moving each joint in various directions. We want to use Rigid Skin Bind data for this as we don’t really need anything more accurate to make it work and computation will be faster that way.
Now that you understand the process, you can figure out why we separated the two steps for the Duo Skin. The precision with which rigid weights are assigned to the mesh determines the quality of our Smooth Skin. Although the two parts are performed in sequence it is important that you understand the chain of operations so you can adequately tweak Rigid Weights in Step 1 when needed.
This approach is very powerful as it gets rid of most local errors that can arise from complex geometry by performing displacement on a smoother and easier shape to manipulate. Here is a video that gives you a pretty good unerstanding of how this works.
SETTINGS
Again click the gear of Skin Atelier to access preferences and tweak according to necessities. For Smooth Skin you can adjust smooth strength. Defaults settings (0.5 for the face and 5 for the body) fit most meshes. Very detailed meshes tend to require a higher smooth strength. The number indicates the number of passes
In some cases, robot notably, you'll have to turn Smooth Skin off. To do so, you can either set max influence per vertex at 1 in Skin Atelier Preferences or select all the joints and set them to off if you want a rigid skinning. You can choose which smooth strength to apply with more finesse in the Picker tab by clicking on waves opposite to joint names. Three waves stand for High, one for Low and off will keep it rigid.

DUO SKIN RESULTS
Here is what you can get for free with proper use of Duo Skin. These Skin Binds were automatically generated with no manual painting. I literally just pressed the right buttons and... Tadam!

We need your help to make akeytsu a better tool.
Write us on forums or our discord channel if you would like us to consider improvements.