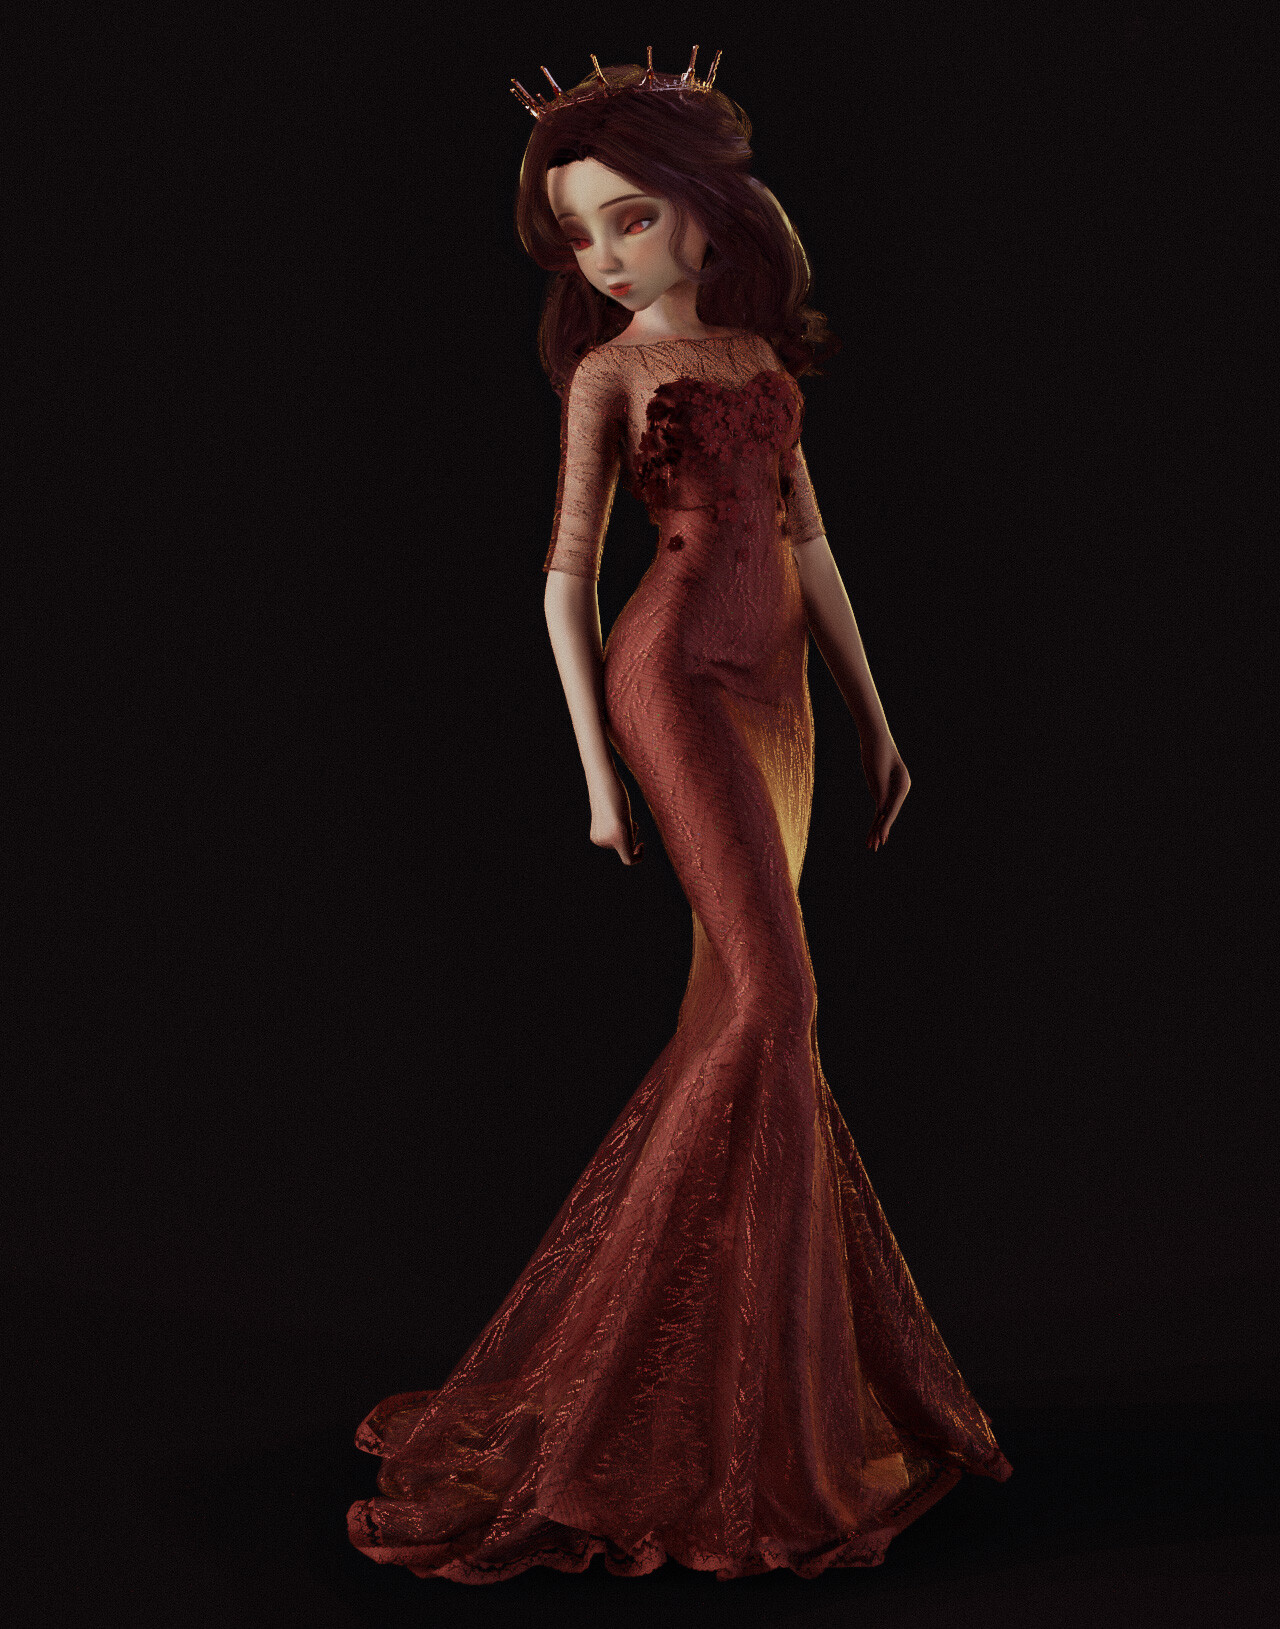
To get to 3rd place in Character Creator Digital Human Contest 2020 (Stylized Character Prize), character artist & 3D fashion illustrator Andee Antillon used akeytsu as a bridge app together with Reallusion's Character Creator 3 and Marvelous Designer. Akeytsu allowed her to put everything together and iterate on posing and camera before going to render stage. In this article she details her workflow and share a few tips about Project Management when building a pipeline involving the use of multiple creative software applications.
Credits : This article features artwork by digital artist Andee Antillon. Follow her on Twitter to see what she is up to..
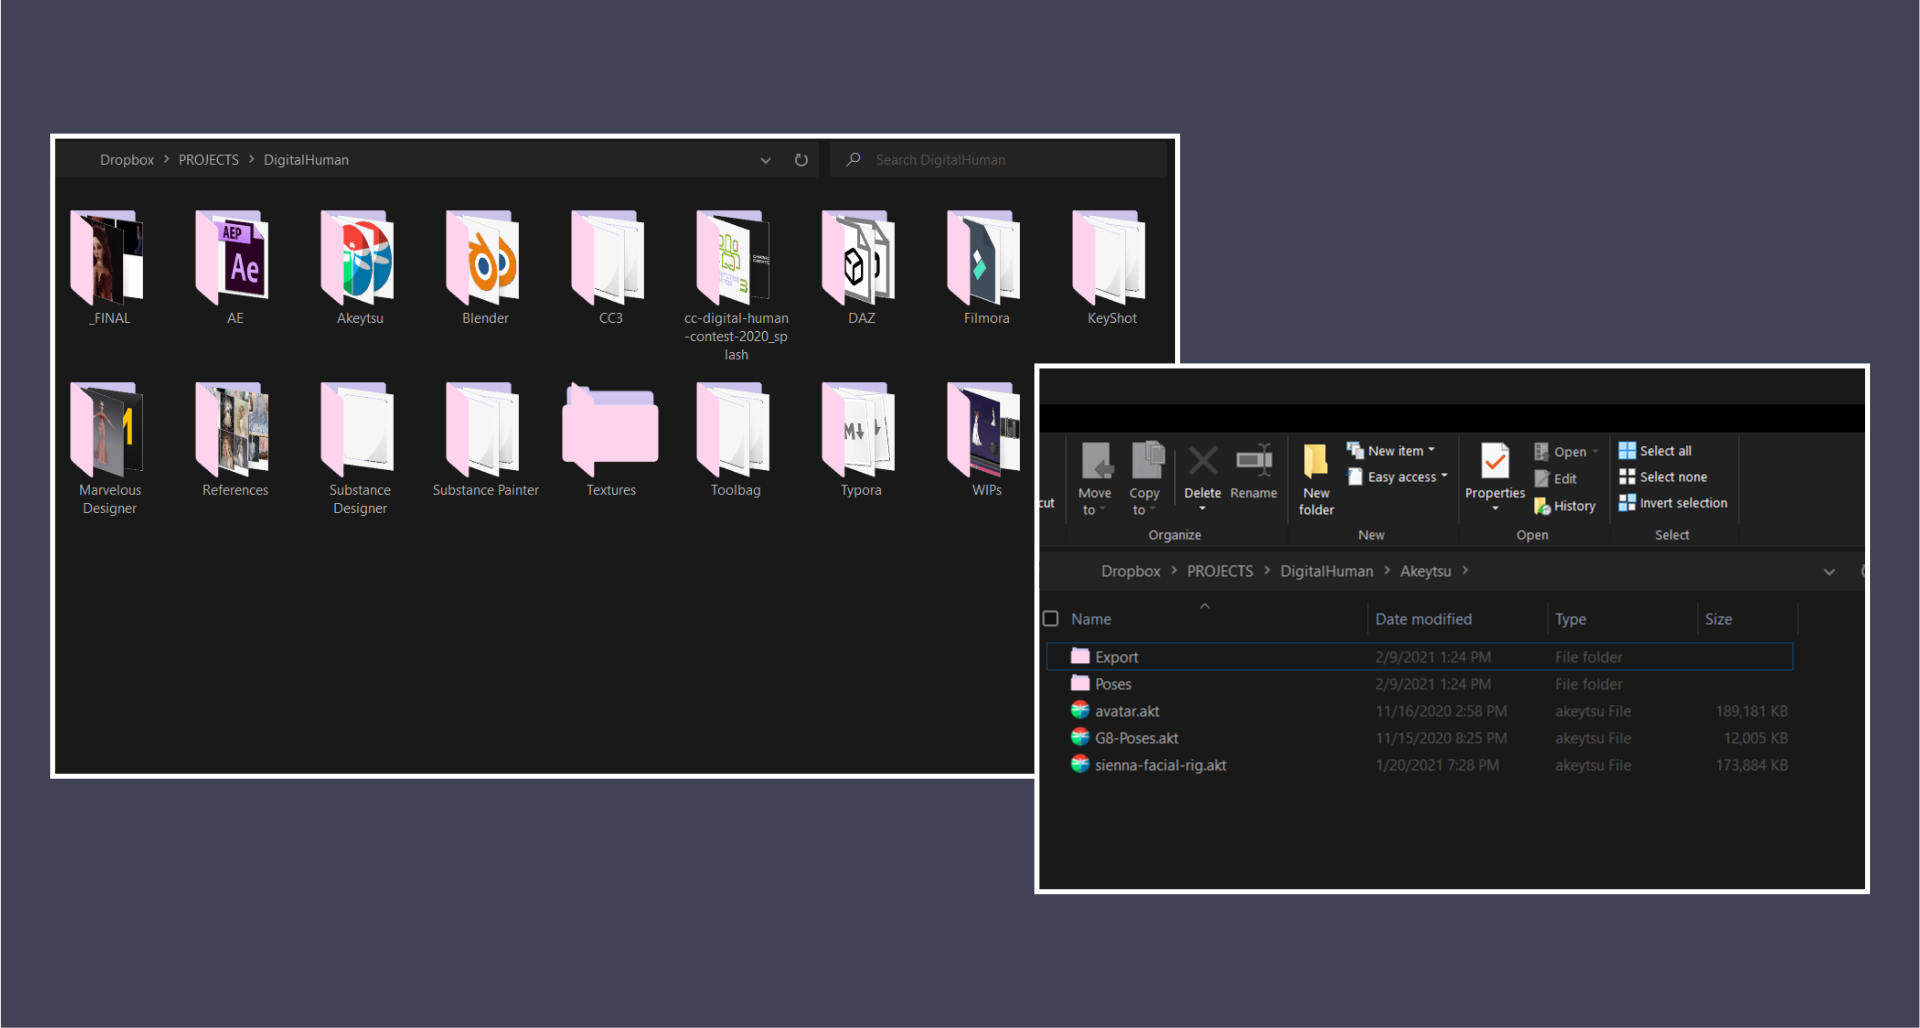
PROJECT MANAGEMENT
- Create a Root folder for the project.
- Create a subfolder for "general" files like [Final Textures] and [Final Renders].
- Create a dedicated subfolder for each software (Akeytsu, CC3, Marvelous Designer, Substance....). In there you can keep all the native files and also add an "Export" folder for files that will be travelling between programs.
- Keep clear file names with increments in case you need to go back.
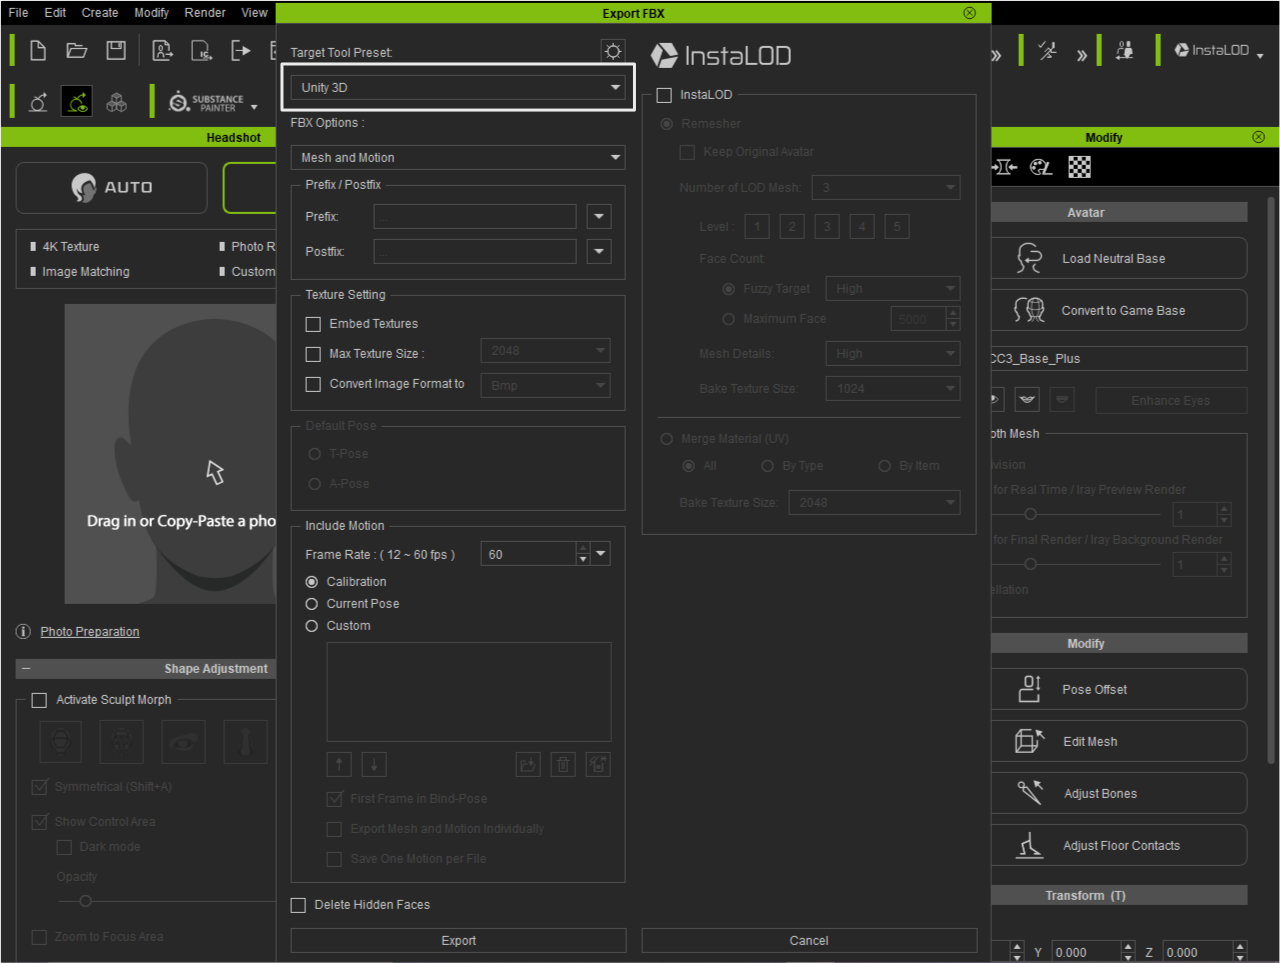
IMPORTING FROM CHARACTER CREATOR 3 INTO AKEYTSU
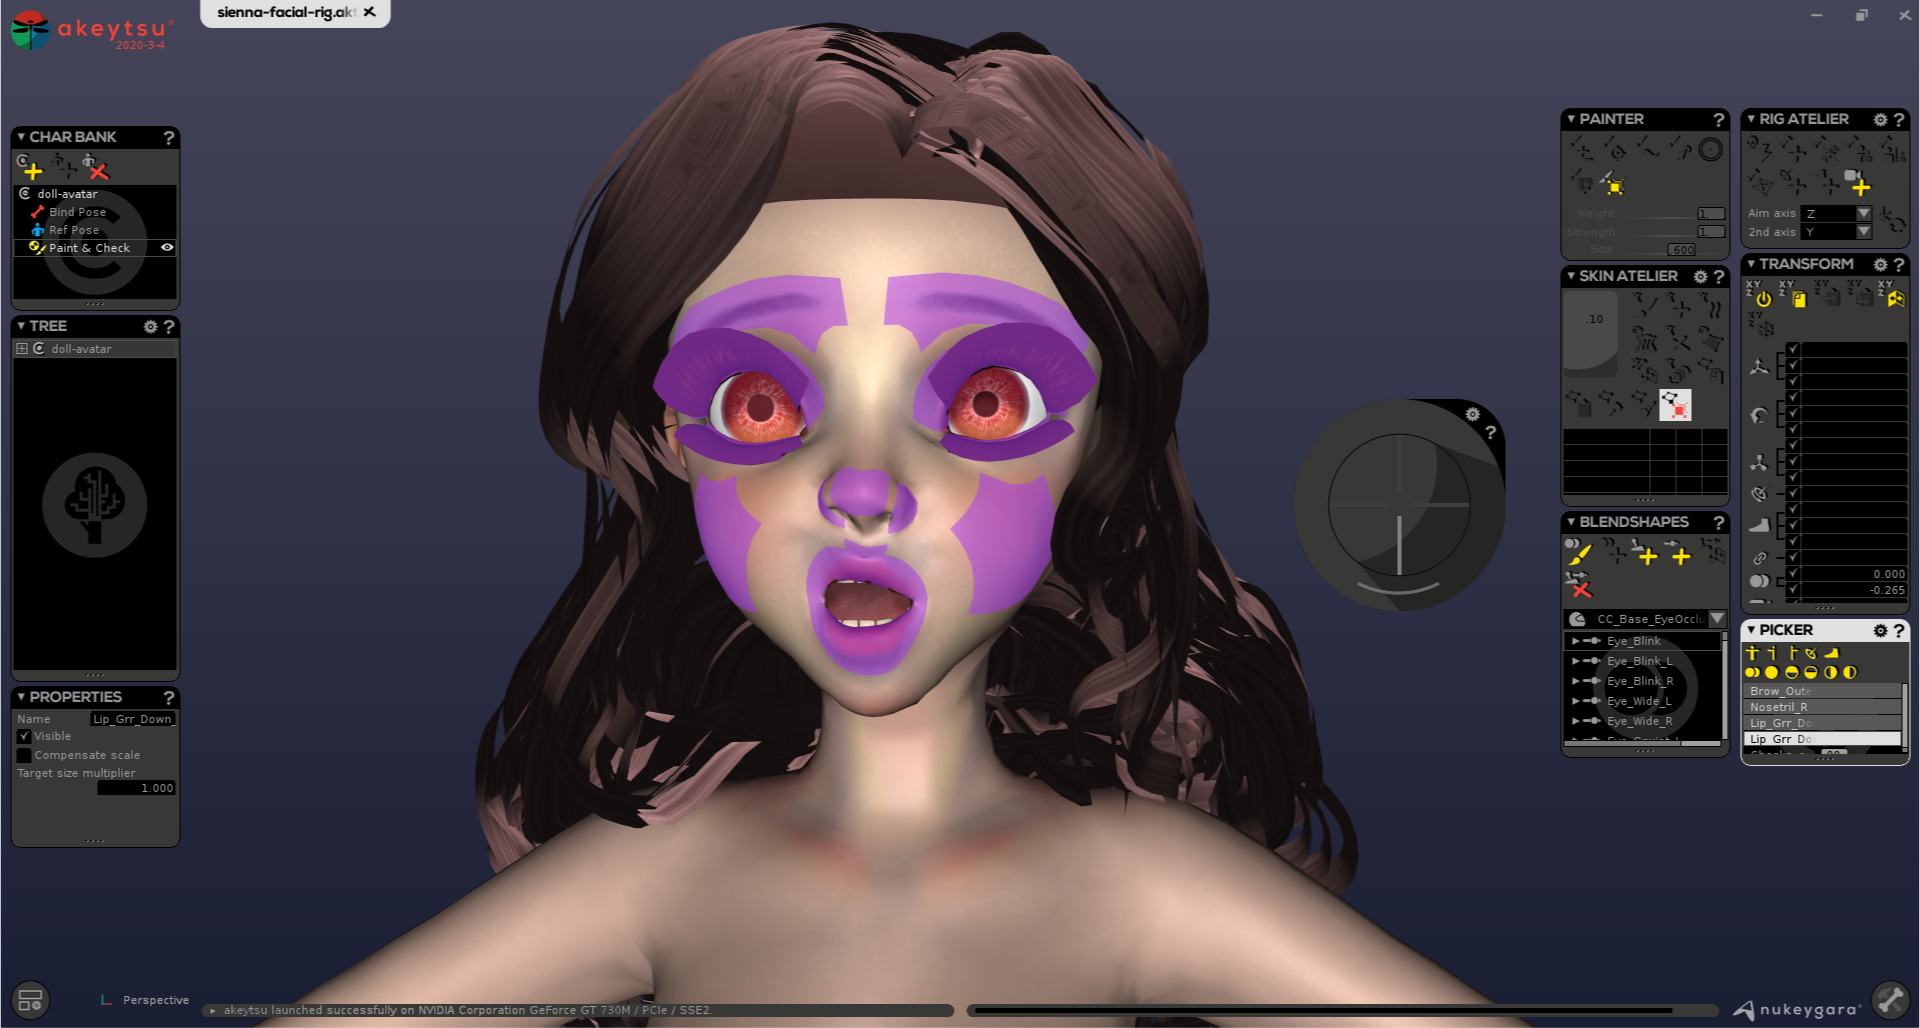
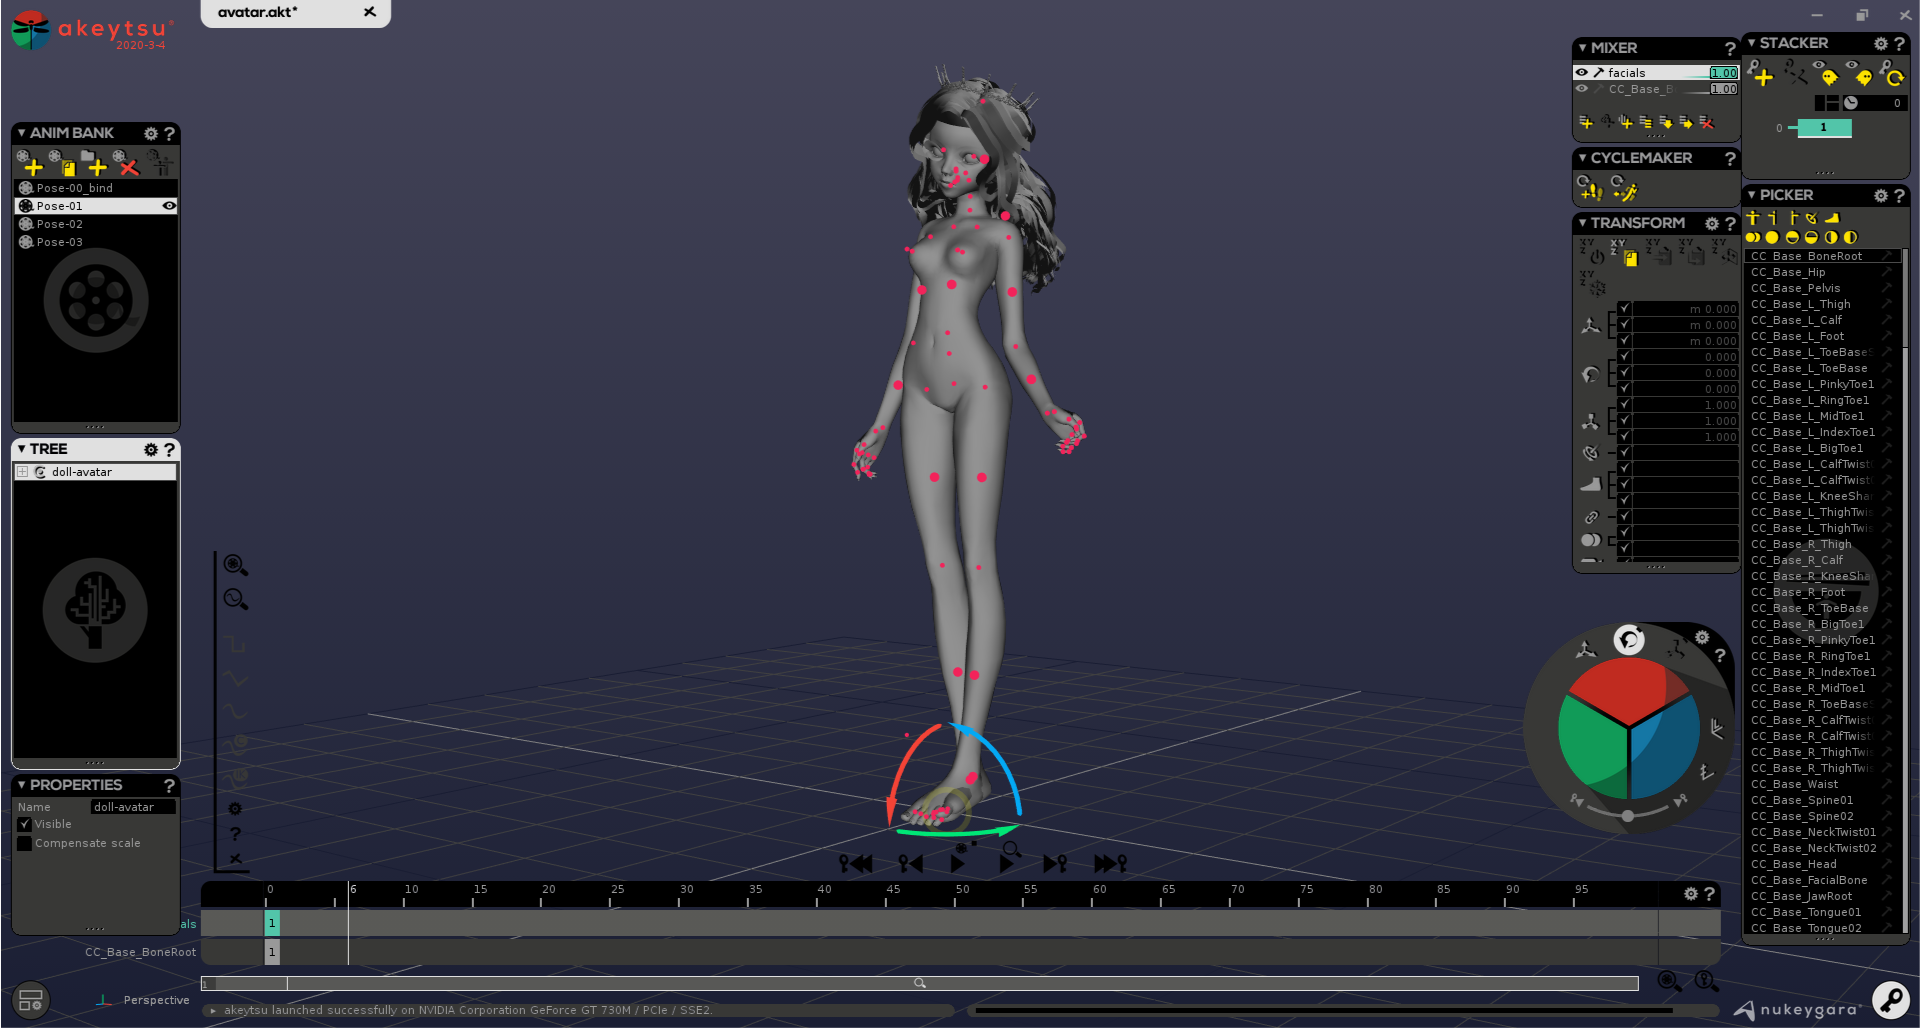
POSING IN AKEYTSU
Rigging in akeytsu is quick and you can easily go back and forth betwee, rigging and animation. When working on Sienna, being able to do super quick object/props rigging (hair, jewellery, accessories) in case it needed to be repoisitioned was helpful. Akeytsu's non-destructive workflow lets you edit skinning weights while preserving your poses which proved essential when working against the clock.
With the CC3-imported skeleton rig, built-in controls in akeytsu through the Spinner and previously mentionned IK-chains, it's fairly easy to work on a pose for a character. The real-time feedback when making adjustments and overall smoothness of the software is a great plus, letting you iterate in a more friendly environment.
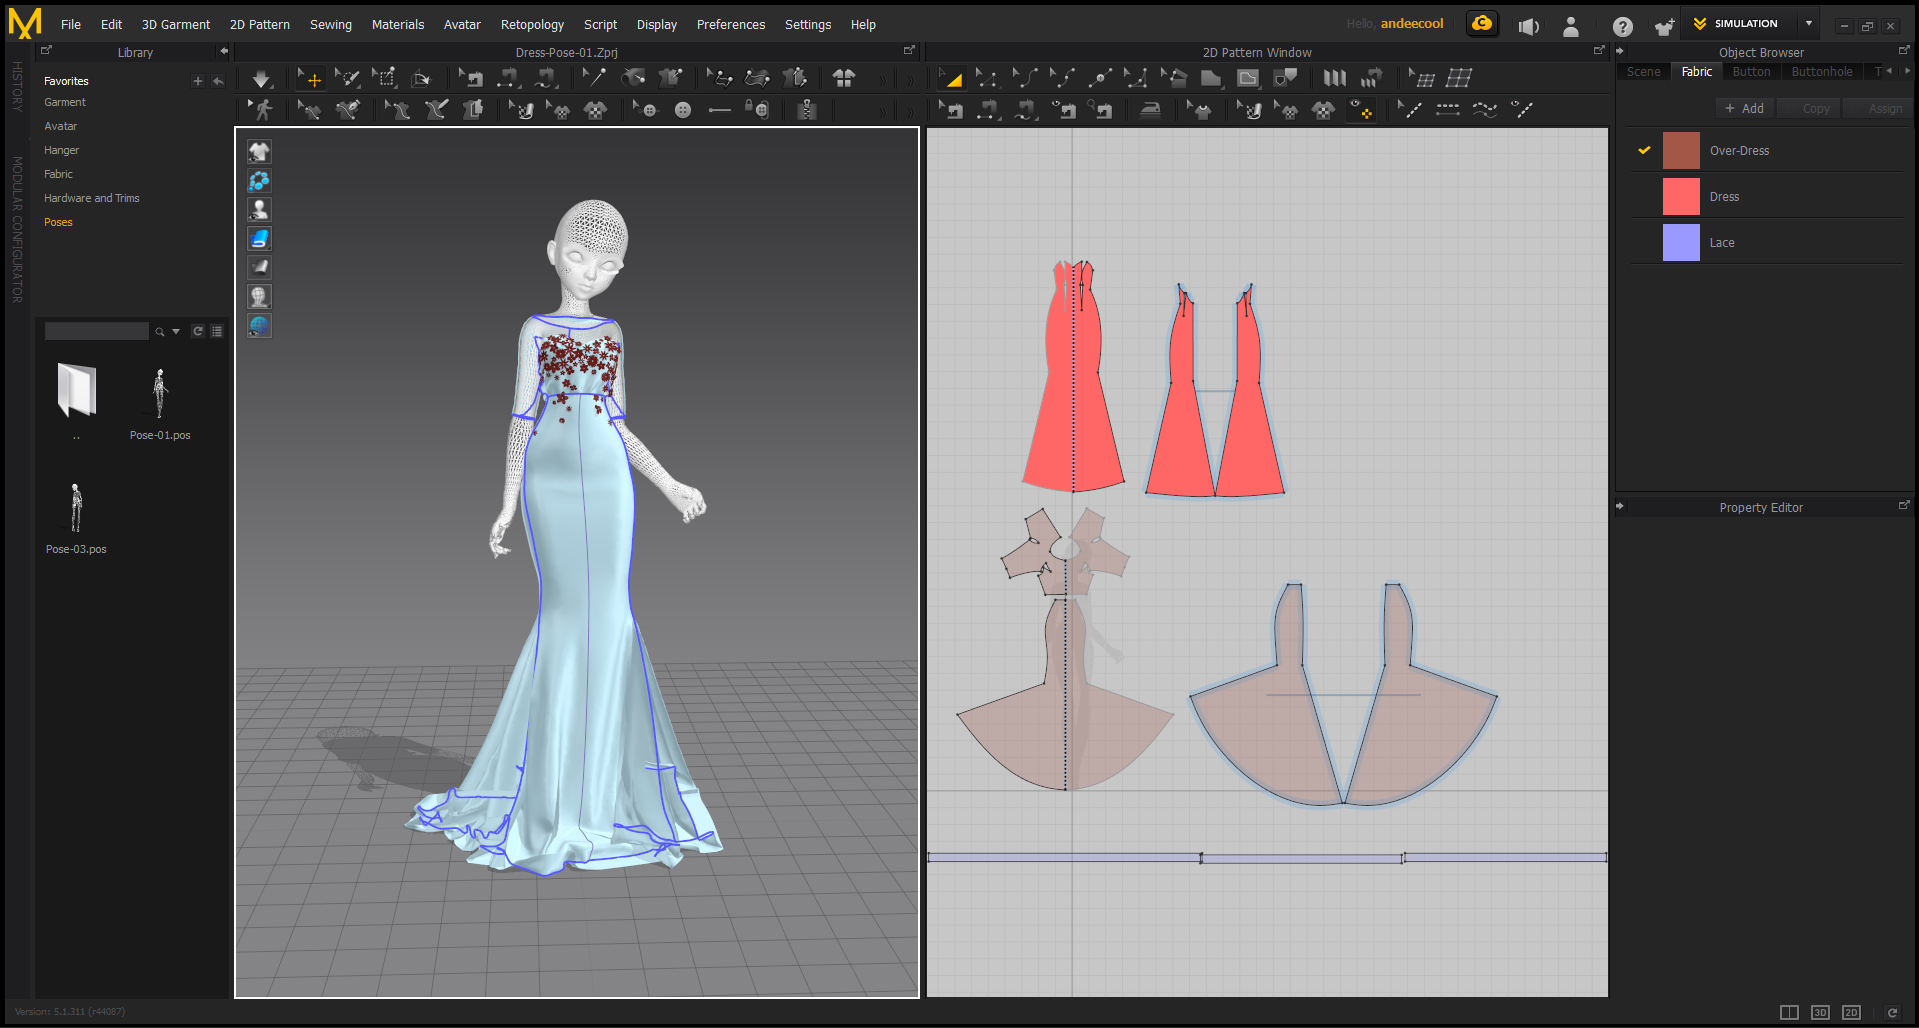
FROM AKEYTSU TO MARVELOUS DESIGNER
To get everything into Akeytsu & Marvelous Designer (MD), I export both A-pose and final poses. Importing A-pose into MD I save it as avatar for future re-use (.avt). As for final poses I'll import them and save them as MD pos assets (.pos).
It's also possible to import animations made in akeytsu. An important side note here is that if you make changes to the rig after import into MD, you may have to re-import and create new avatars/poses/animations as it may break compatibility between them.
To start working on garments
- Go back to the MD Avatar, create garnments and save the project file in A-pose.
- In a new file, assign the created pose asset and simulate.
- Export garnments without avatar.
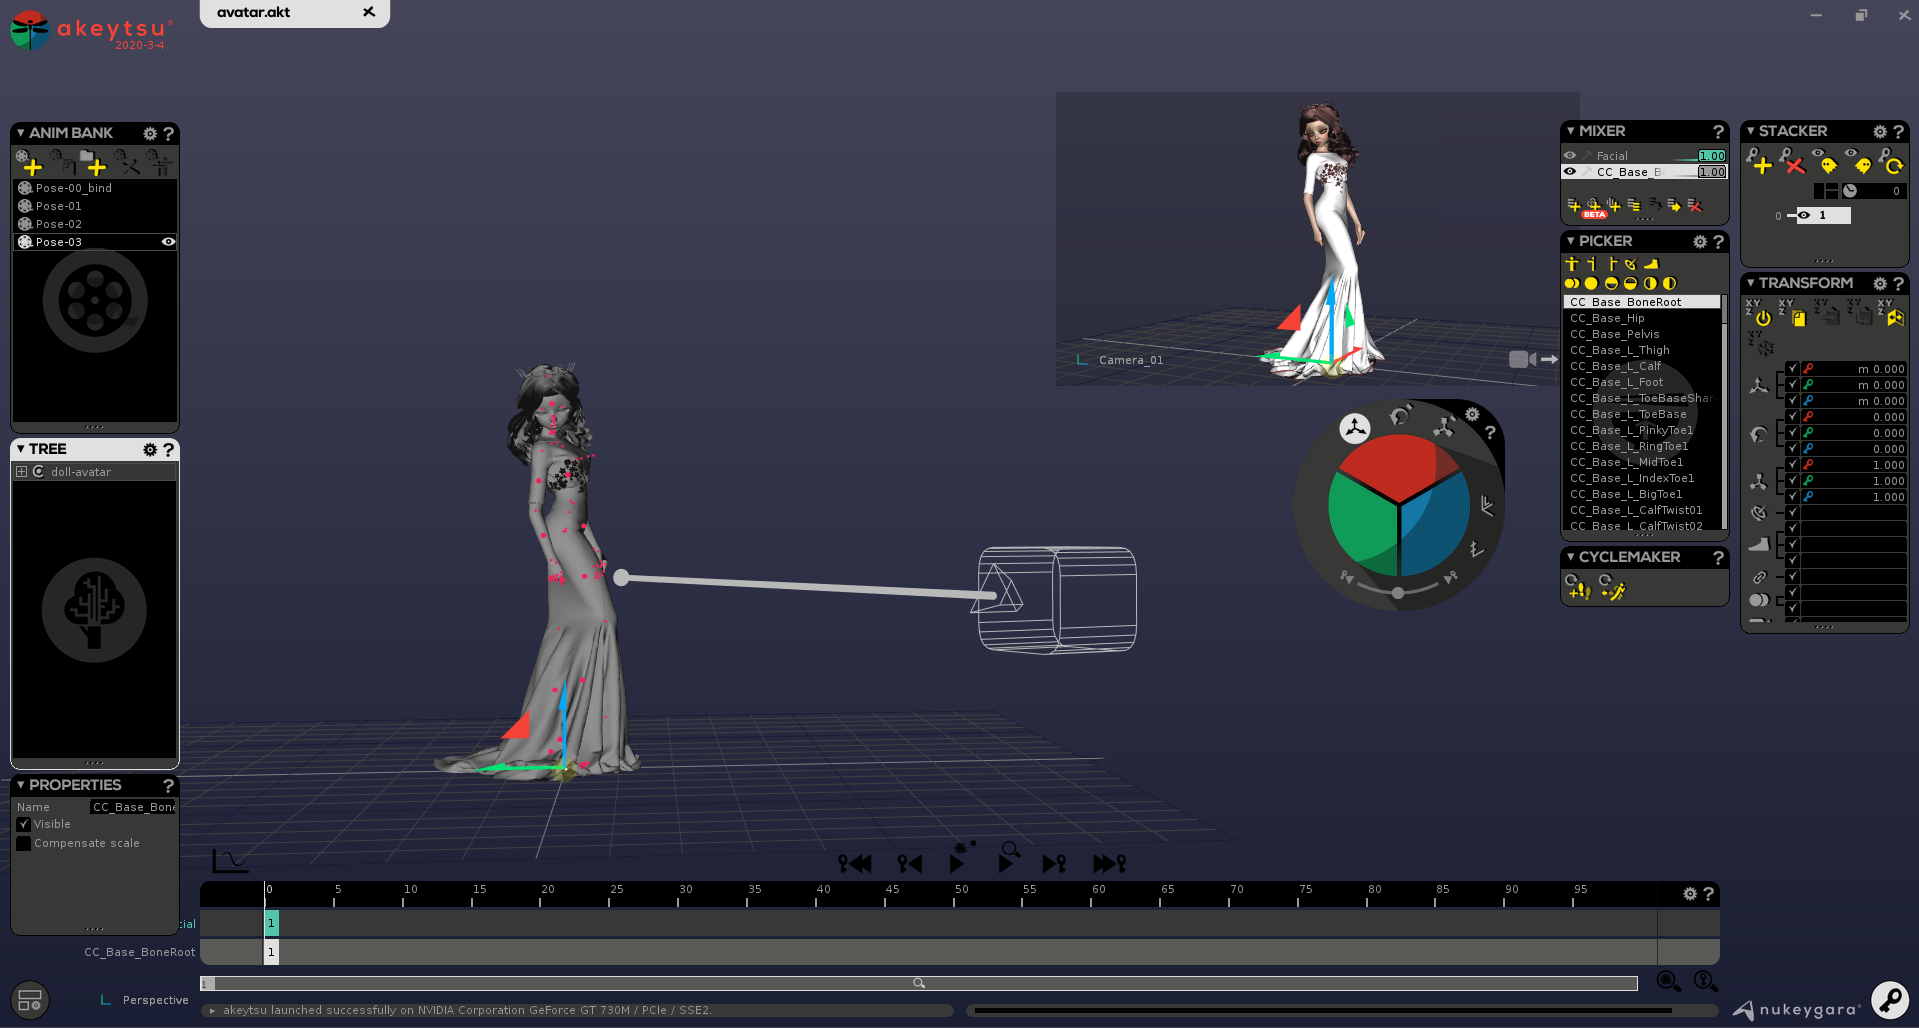
CAMERA PREVIEW IN AKEYTSU
You can then export the whole scene from akeytsu and have it ready for render !
We need your help to make akeytsu a better tool.
Write us on forums or our discord channel if you would like us to consider improvements.